Rain chambers are basically tanks that have a rain bar and a pump that allows water to "rain"
on frogs in the tank to simulate a rainy season. At the moment, I am building one for waxy monkey treefrogs.
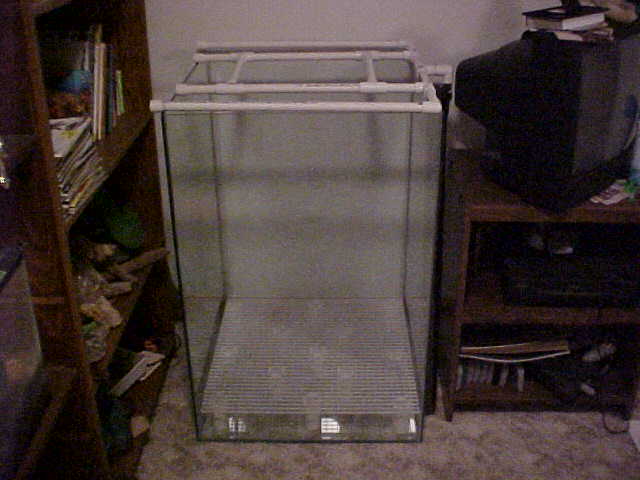
Step 1: The first step is the false-bottom. You need to put a false bottom in your tank, so follow the
instructions on the false-bottom page. Also, if you have more terrestrial frogs, just have 1/2 the tank false bottom to allow
a water area and the so the frogs don't climb under the false bottom, place a strip of eggcrate going vertical from the tank
floor to the other egg crate piece. This is used as a barrier. If you want, you can place a submersible heater under the false
bottom to heat the water. Also, put a small pump under the false bottom and have it's tubing stick out the top of the false
bottom.
Step 2: The second step is the tank decor and bedding. For the bedding, I wouldn't use any brown soil
or bed-a-beast, because as the water runs through it, it will turn brown. In my rain chamber, I'm laying down spahgnum moss
and feeding crickets through a bowel, so the crickets don't hide in the moss. For the tank decor, you can have anything you
would like, but research your species and try to mimic it's homeland. Since they will only bee in the rain chamber for about
a week, nothing should rot. I will have manzanita wood in mine, as well as many pothos plants, because they lay their eggs
on these.
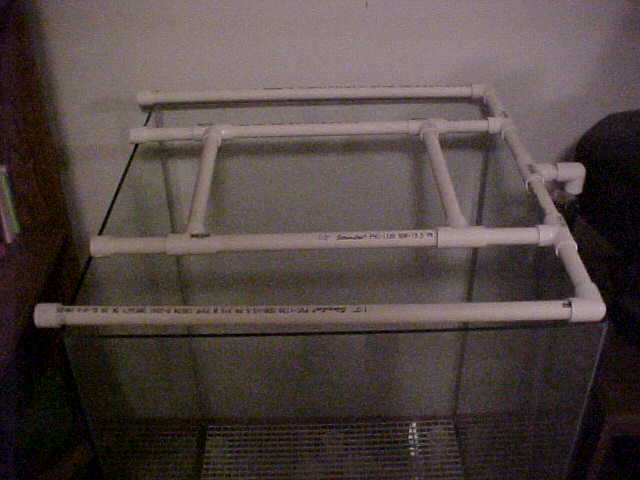
Step 3: The third step is the rain bar. This is a bar constructed from PVC pipe that will let the water
"rain" onto the frogs. This bar can be as simple or as complex as you like. Build the rain bar (I used 1/2" PVC) and make
sure it looks alright in your opinion. Now, it's time to drill holes into the pipe. Find the smallest drill bit and drill
along the bottom side of the pipe. You may want to do 2-3 rows of holes and have them angled differently to cover more
area. Make sure to dry fit the pipes to make sure they fit, and they cement them. And don't forget to have an open fitting
to place the water hose into the the water can flow through and rain down. Now your rain bar is complete.
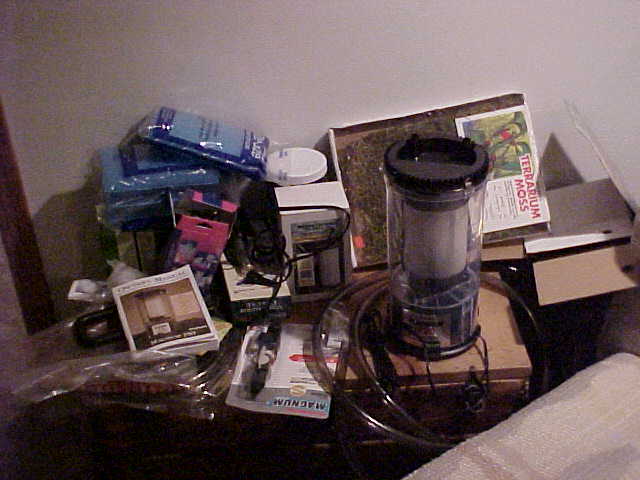
Step 4: The fourth step is the filter. I recommend using an external power filter for your rain
chamber. These may cost more, but it's well worth it. They filter very well and are conveniate, because the sit outside the
tank. I have a Magnum 220 with almost all of the acessories to make it easier to work. Connect the hose from the external
power filter ( I would suggest getting more hose to make sure it will connect with ease) to the rain bar and make sure it
is snug. An adapter may be needed to accomplish this.
Step 5: The fifth step is the final adjustments. You will need to connect the pump in the tank (under
the false bottom) to the filter, so the water can be sucked from the bottom of the tank, to the filter, to the rain bar, and
back to the tank. Now your rain chamber is complete. Just add your frogs and let them stay in there about a week. You should
see amplexus within that time period, if not, return them to their normal tanks. They should be fed well for about 3 weeks
and then returned to the rain chamber. Repeat this process if needed, or get more frogs if you think you don't have at elast
a pair. Good Luck!